JHeightMap - module for visualization of height maps in Java
Department of Computer Science and Engineering,
University of West Bohemina in Pilsen, Czech Republic
Created as the Bachealor Thesis (M. Kinkor: Module for Height Map Visualisation in Java, 2011), and further adjusted
Java3D instalation
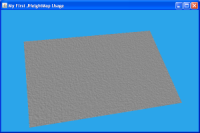
The first example shows very simple way how any height map represented as the number matrix can be visualized. For this case, the matrix is generated randomly. In a practically use, matrix should be gained as the result on any computation. Usage of the module is simple, it is just important to link the library (.JAR file) to the project and to use several classes:
- JDefaultDataMap
- data layer representation (coordinates, normals, ...)
- data have to be saved in the vector, and so, the matrix representation has to be transformed - method DefaultDataMap.matrix2vector(...) - JDefaultHeightMap - height map representation (colors, geometry, ...)
- JPanelMap
- creates panel, that can be added into JFrame or JDialog and that enables to control the view
with tho mouse movement (left buton - rotation, right buton - movement, scrolling - zoom)
- JPanelMap object has to be compiled, otherwise no object is shown - method compileScene();
import java.awt.Dimension;
import java.util.Random;
import javax.swing.JFrame;
import JHeightMap.JDefaultDataMap;
import JHeightMap.JDefaultHeightMap;
import JHeightMap.JPanelMap;

public class FirstHeightMap extends JFrame {
	private final int WINDOW_WIDTH = 600;
	private final int WINDOW_HEIGHT = 400;

	private final int DATA_WIDTH = 300;
	private final int DATA_HEIGHT = 200;

	public FirstHeightMap() {

		// generates random values into the matrix
		float[][] myData = new float[DATA_WIDTH][DATA_HEIGHT];
		Random r = new Random();
		for (int i = 0; i < myData.length; i++) {
			for (int j = 0; j < myData[0].length; j++) {
				myData[i][j] = r.nextFloat();
			}
		}
		float[] dataVector = JDefaultDataMap.matrix2vector(myData); // converts data matrix to vector
		JDefaultDataMap data=new JDefaultDataMap(dataVector, DATA_WIDTH, DATA_HEIGHT);

		JDefaultHeightMap map=new JDefaultHeightMap(data);
		JPanelMap panel=new JPanelMap(map);
		panel.compileScene();
		add(panel);

		this.setTitle("My First JHeightMap Usage");
		this.setDefaultCloseOperation(JFrame.DISPOSE_ON_CLOSE);
		this.setPreferredSize(new Dimension(WINDOW_WIDTH, WINDOW_HEIGHT));
		this.pack();
		this.setVisible(true);
	}

	public static void main(String[] args) {
		new FirstHeightMap();
	}
}
This example shows several two more functions which can be used. Differences from the first example are highlighted in the source code. Both features can be used together or independently:
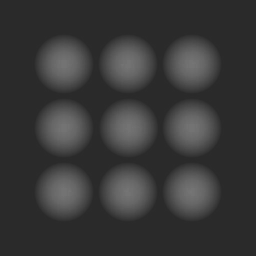
- image loading - instead of data matrix we can visualize JPG, PNG or BMP image. The only difference has to be done in data layer preparation, where the loader shoul be used. All further steps are the same as in the previous example.
- key control activation with further setting - if we want to controll the
panel with keys, we have to add JControls to the panel.
Values used in the constructor represent the step size for zoom and rotation.
If no values are set, default values zoomInc=0.01 and angleInc=1 are used.
Control keys used default:
- arrows - rotation of the object
- I - zoom in
- O - zoom out
- P - capture an actual image
- F1 - help

import java.awt.Dimension;
import javax.swing.JFrame;
import JHeightMap.JDefaultDataMap;
import JHeightMap.JDefaultHeightMap;
import JHeightMap.JGraphicLoadMap;
import JHeightMap.JPanelMap;

public class FileLoad extends JFrame {
	private final int WINDOW_WIDTH = 600;
	private final int WINDOW_HEIGHT = 400;

	private final double ZOOM_INC = 0.5;
	private final int ANGLE_INC = 10;

	public FileLoad() {
		String fileName="data\\image.png";
		JGraphicLoadMap loader=new JGraphicLoadMap(fileName);
		JDefaultDataMap data=new JDefaultDataMap(loader);

		JDefaultHeightMap map=new JDefaultHeightMap(data);
		JPanelMap panel=new JPanelMap(map);
		panel.compileScene();
		add(panel);

		JControls controls=new JControls(panel, ZOOM_INC, ANGLE_INC);
		panel.setBehavior(controls);

		this.setTitle("My First JHeightMap Usage");
		this.setDefaultCloseOperation(JFrame.DISPOSE_ON_CLOSE);
		this.setPreferredSize(new Dimension(WINDOW_WIDTH, WINDOW_HEIGHT));
		this.pack();
		this.setVisible(true);
	}

	public static void main(String[] args) {
		new FileLoad();
	}
}
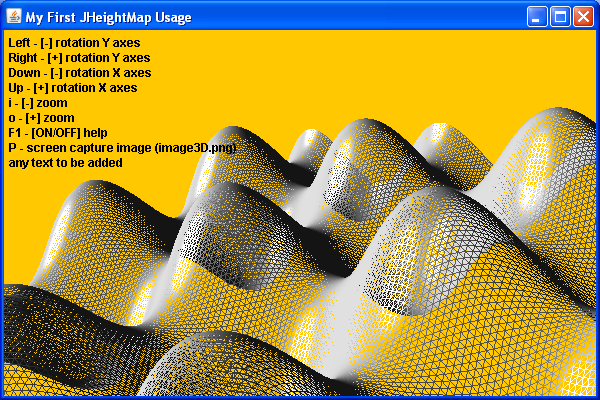
Other advanced features are shown in the thirt example, all of them can be again used separatelly or in any combination even with the previous ones.
- CSV load - usage of another loader enables to visualize also CSV files containing double values separated with semicolons.
- wiremodell - if we want to see net of triangles instead of the smooth height map surface, we have to use the wireModelMap atribude on true - map.setWireModelMap(true);
- panel color background - as a default color the light blue is used, another one has to be specified in the panel constructor
- adding of a help text - any text can be added to the help description, it is only necessary to use addText(...) method for the objects of panel controls
 CSV download
import java.awt.Color;
import java.awt.Dimension;
import javax.swing.JFrame;
import JHeightMap.JCSVLoadMap;
import JHeightMap.JControls;
import JHeightMap.JDefaultDataMap;
import JHeightMap.JDefaultHeightMap;
import JHeightMap.JPanelMap;

public class FileLoadCSV extends JFrame {
	private final int WINDOW_WIDTH = 600;
	private final int WINDOW_HEIGHT = 400;

	public FileLoadCSV() {
		String fileName="data\\data.csv";
		JCSVLoadMap loader=new JCSVLoadMap(fileName);
		JDefaultDataMap data=new JDefaultDataMap(loader);

		JDefaultHeightMap map=new JDefaultHeightMap(data);
		map.setWireModelMap(true);
		JPanelMap panel=new JPanelMap(map, Color.ORANGE);
		panel.compileScene();
		add(panel);

		JControls controls=new JControls(panel);
		panel.setBehavior(controls);
		controls.addText("any text to be added");

		this.setTitle("My First JHeightMap Usage");
		this.setDefaultCloseOperation(JFrame.DISPOSE_ON_CLOSE);
		this.setPreferredSize(new Dimension(this.WINDOW_WIDTH, this.WINDOW_HEIGHT));
		this.pack();
		this.setVisible(true);
	}

	public static void main(String[] args) {
		new FileLoadCSV();
	}
}
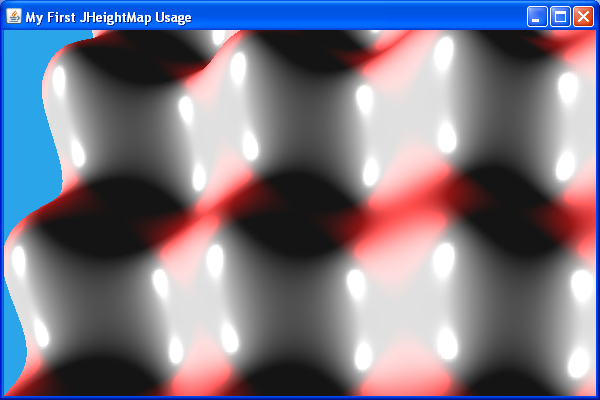
The last example describes the basic work with lights. Four different types of light can be used - ambient, directional, spot and point. This example works with the directional one. Into the sceene several lights can be added. Each of them has to have its direction and color, method addChilder() puts the created light into the scene and finally, it has to be added into the panel.
import java.awt.Dimension;
import javax.swing.JFrame;
import javax.vecmath.Color3f;
import javax.vecmath.Vector3f;
import JHeightMap.JCSVLoadMap;
import JHeightMap.JDefaultDataMap;
import JHeightMap.JDefaultHeightMap;
import JHeightMap.JLight;
import JHeightMap.JPanelMap;

public class LightsHeightMap extends JFrame {
	private final int WINDOW_WIDTH = 600;
	private final int WINDOW_HEIGHT = 400;

	public LightsHeightMap() {
		String fileName="data\\data.csv";
		JCSVLoadMap loader=new JCSVLoadMap(fileName);
		JDefaultDataMap data=new JDefaultDataMap(loader);

		JDefaultHeightMap map=new JDefaultHeightMap(data);
		JPanelMap panel=new JPanelMap(map);
		panel.compileScene();
		add(panel);

		JLight light=new JLight(JLight.DIRECTIONAL_LIGHT);
		light.setDirect(new Vector3f(1.0f, 0.0f, 1.0f));
		light.setColor(new Color3f(1.0f, 0.0f, 0.0f));
		light.addChilder();
		panel.addLight(light);

		this.setTitle("My First JHeightMap Usage");
		this.setDefaultCloseOperation(JFrame.DISPOSE_ON_CLOSE);
		this.setPreferredSize(new Dimension(this.WINDOW_WIDTH, this.WINDOW_HEIGHT));
		this.pack();
		this.setVisible(true);
	}

	public static void main(String[] args) {
		new LightsHeightMap();
	}
}